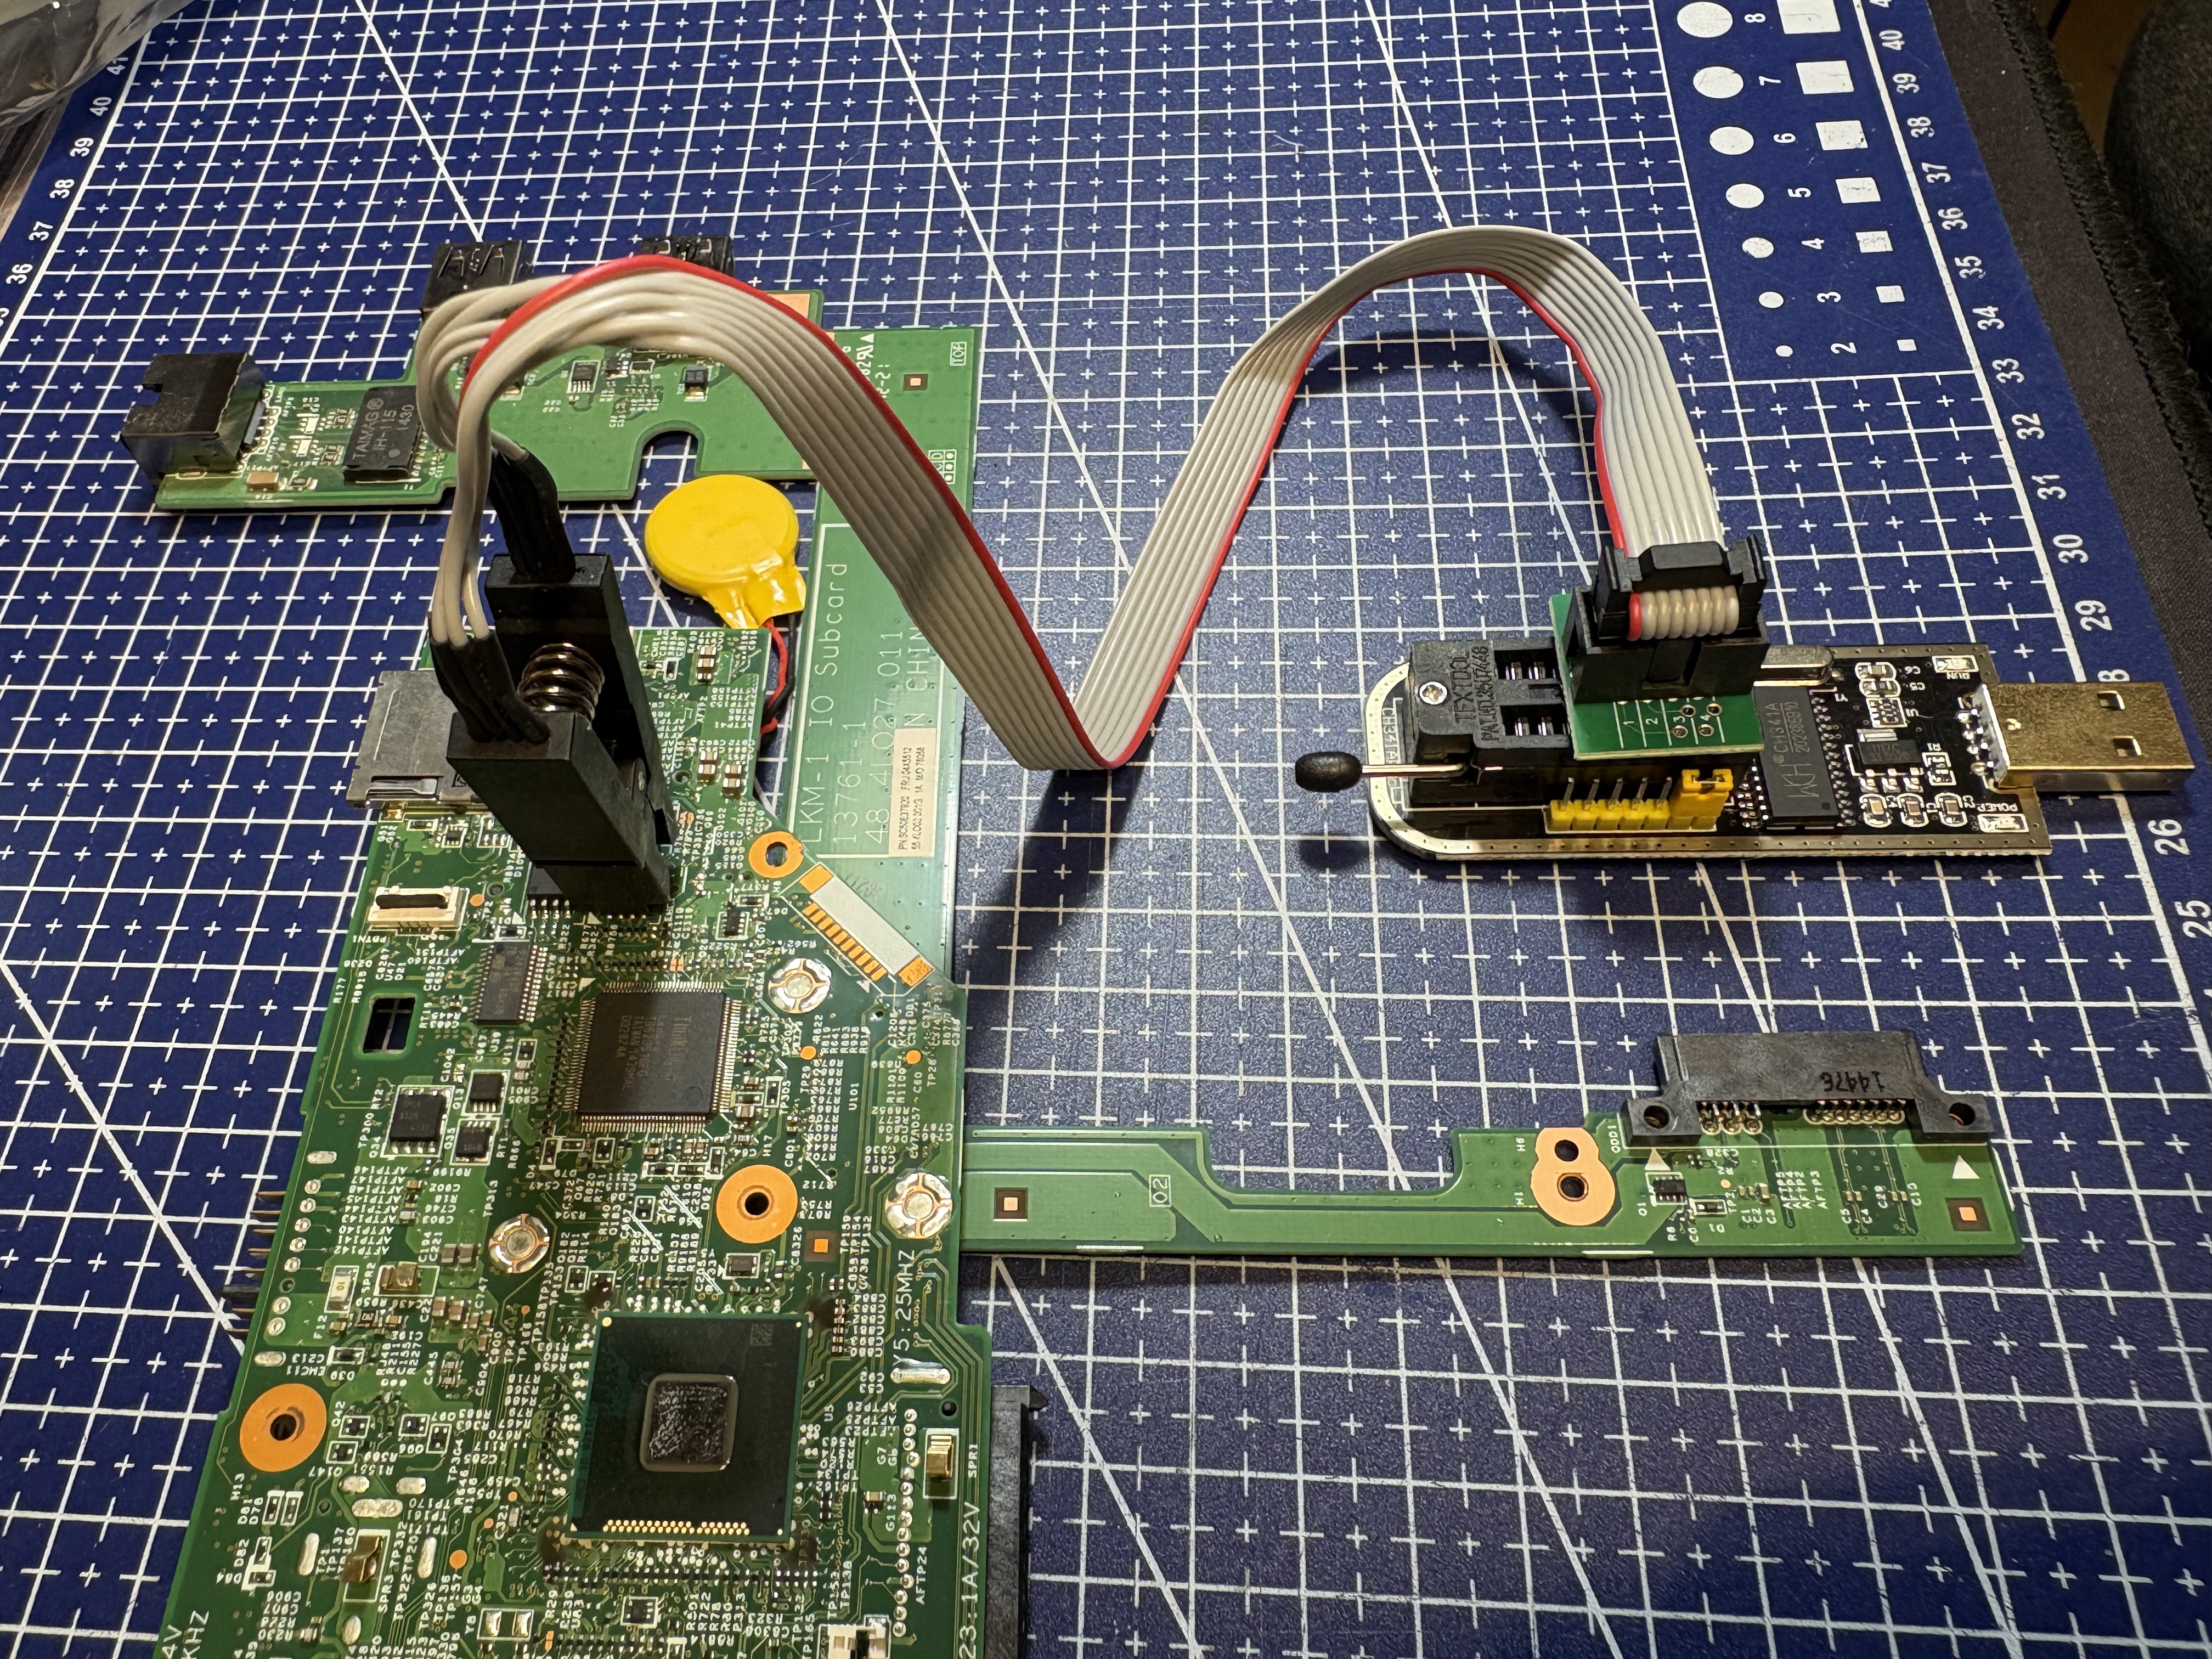
My ThinkPad T540p ended up with a supervisor (BIOS) password after a Lenovo BIOS update… The machine still powered on, but the BIOS setup was locked and the hard drive was SVP-locked. Rather than replacing the mainboard or sending it to a repair shop, I and AI removed the password by dumping the BIOS flash chip, patching it, and re-flashing — using a cheap CH341A USB programmer and a SOIC-8 test clip.
I was following the process from BADCAPS but it turned out to be more involved than the usual “run the auto-patcher and flash” recipe, because this particular BIOS (GMET91WW, a 2021 build) enforces an RSA signature check on the patched image and refuses to boot otherwise. This post documents the full procedure that worked.
The hardware
Lenovo ThinkPad T540p
└── BIOS flash: MX25L3273E  (4 MiB, SOIC-8 SPI NOR)
        └── CH341A USB SPI programmer + SOIC-8 clip
The board connection CH341A and the SOIC-8 clip

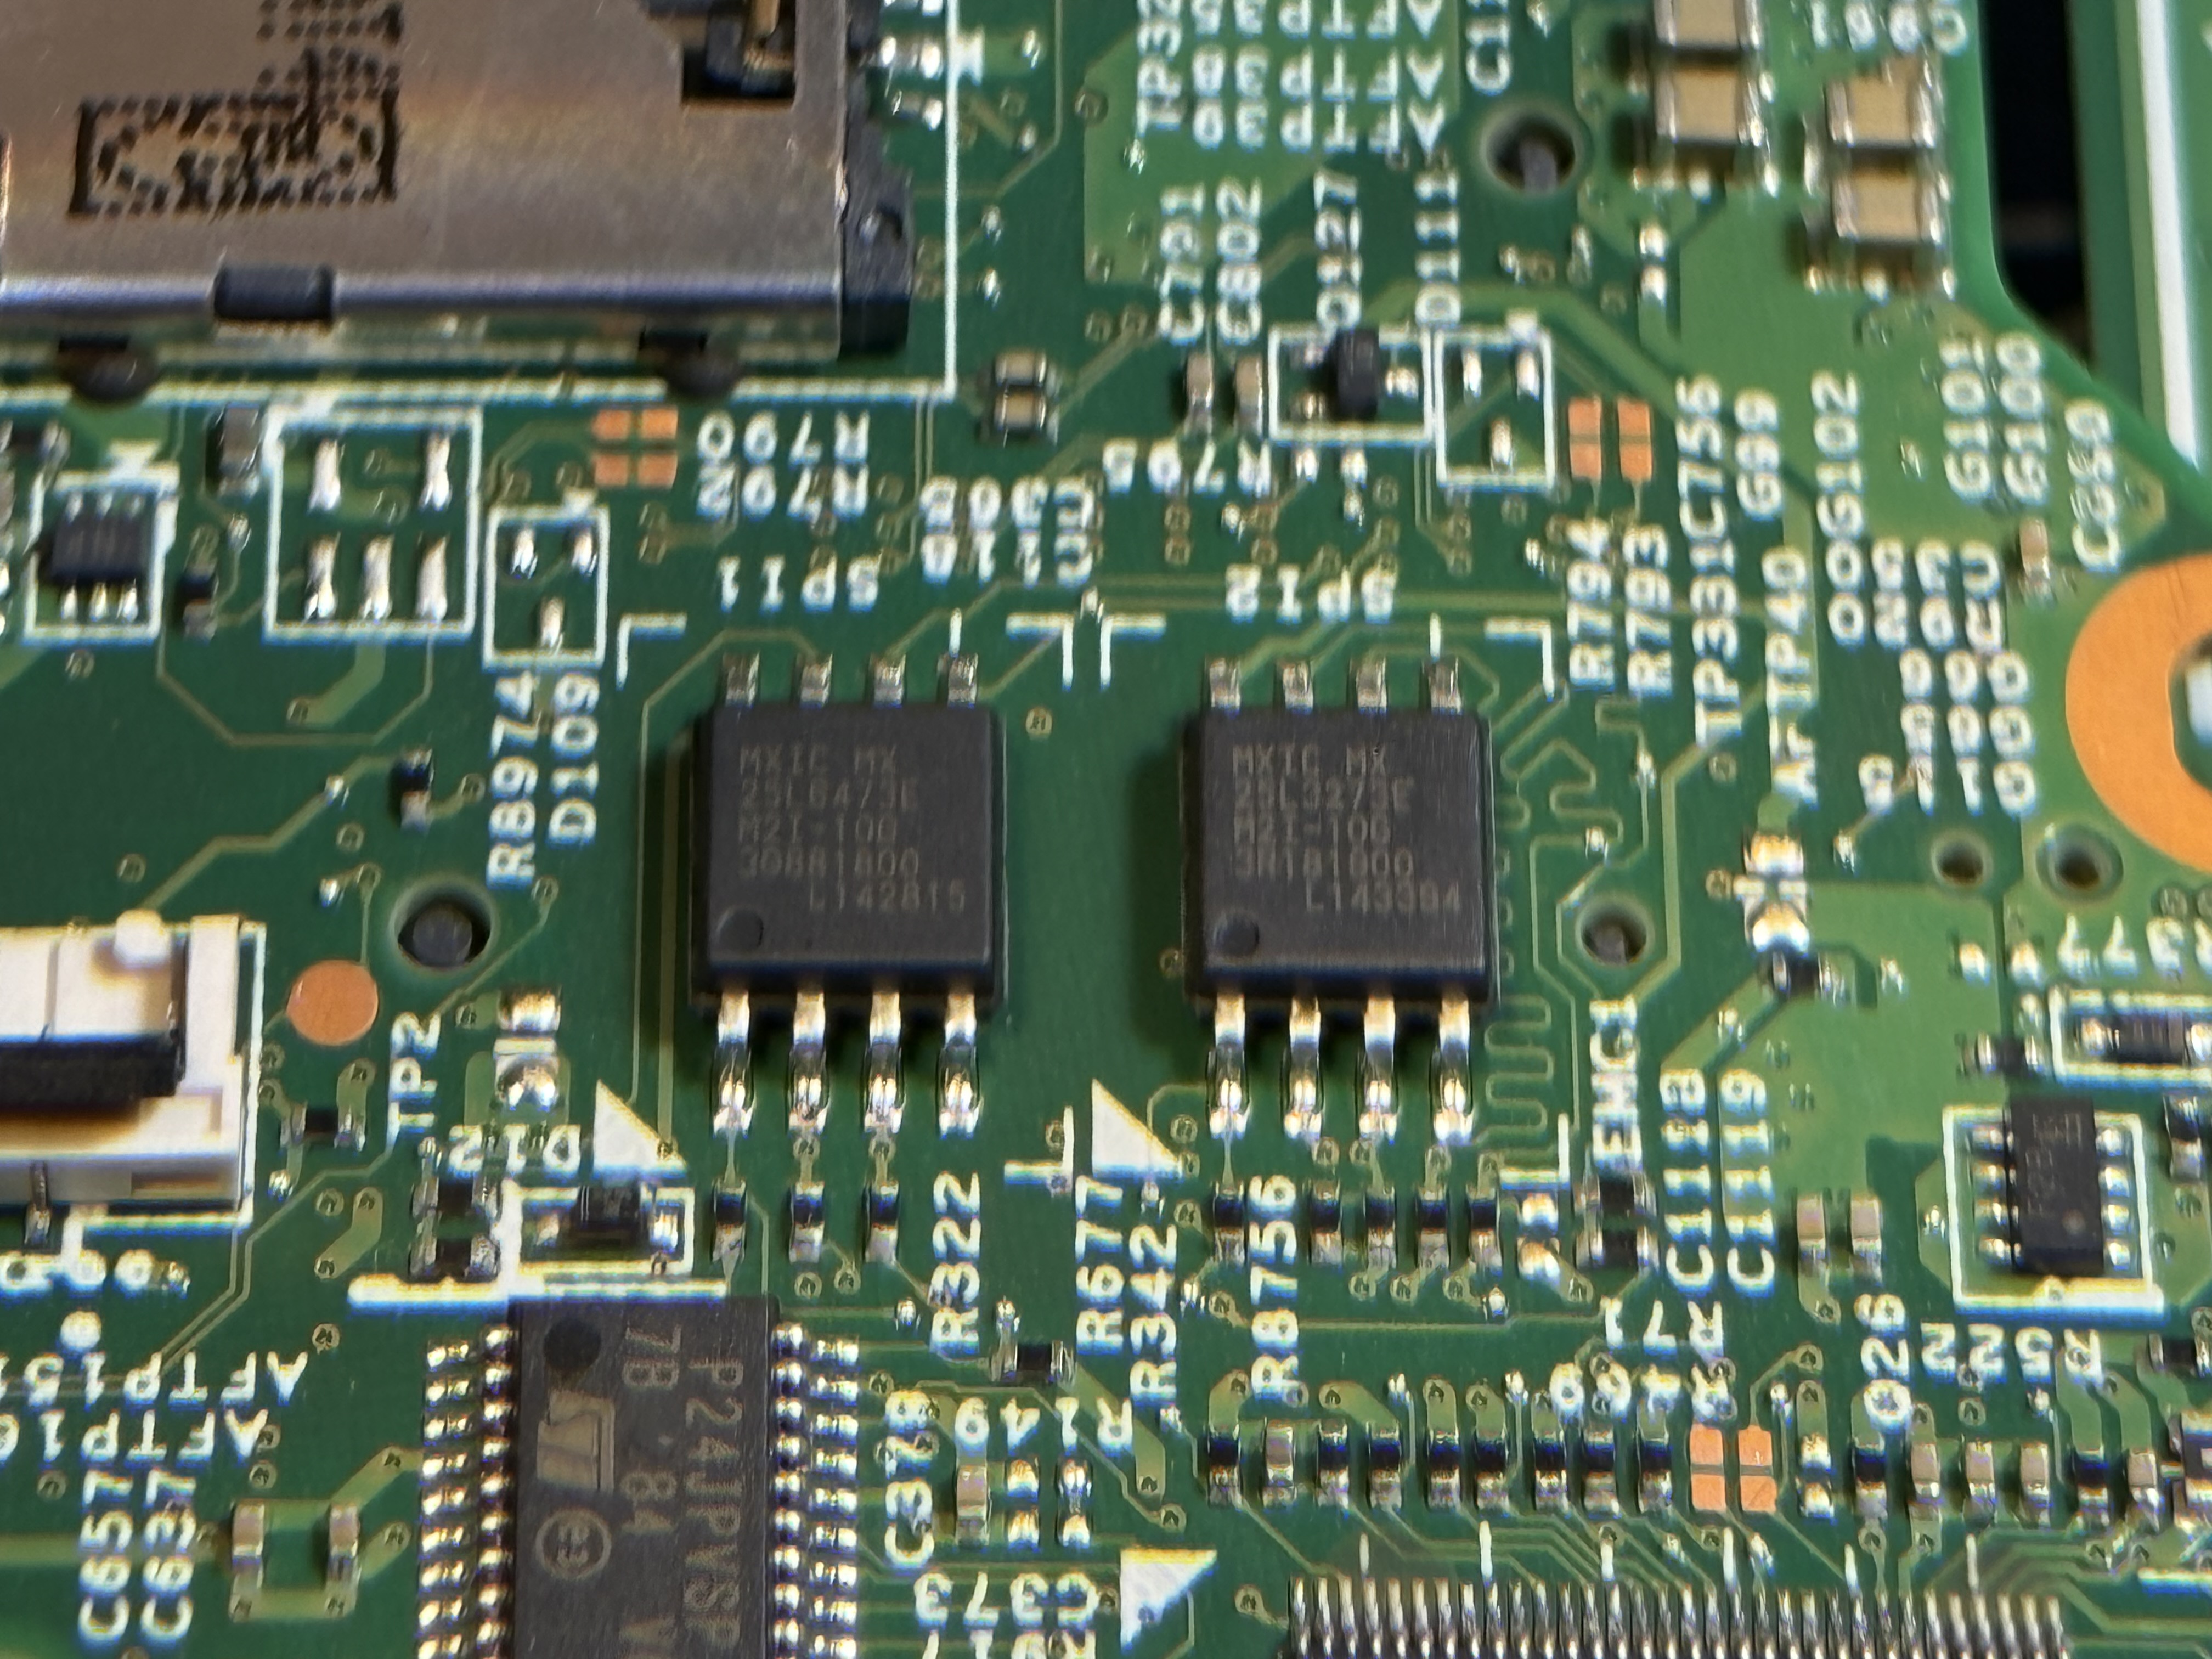
The T540p is a Haswell-era machine, it carries an 8 MiB chip (MX25L6405 family) and the proper BIOS one 4 MiB MX25L3273E. Either way, the procedure is the same — you just need the right chip definition.
Chips on board, the BIOS is the right one
The plan
- Dump the BIOS chip with
flashrom - Verify the dump (multiple reads, identical hashes)
- Patch the dump with the Lenovo BIOS auto-patcher (injects two DXE drivers)
- Re-sign the modified BIOS so the machine actually boots it
- Flash the signed image and trigger the unlock challenge
- Restore the original BIOS
Most guides stop at step 3 and 5. The signature step in between is what makes the difference on newer BIOS builds.
Dumping the chip
A SOIC-8 clip sits on top of the chip without desoldering. The CH341A talks to it over SPI, and flashrom drives the whole thing:
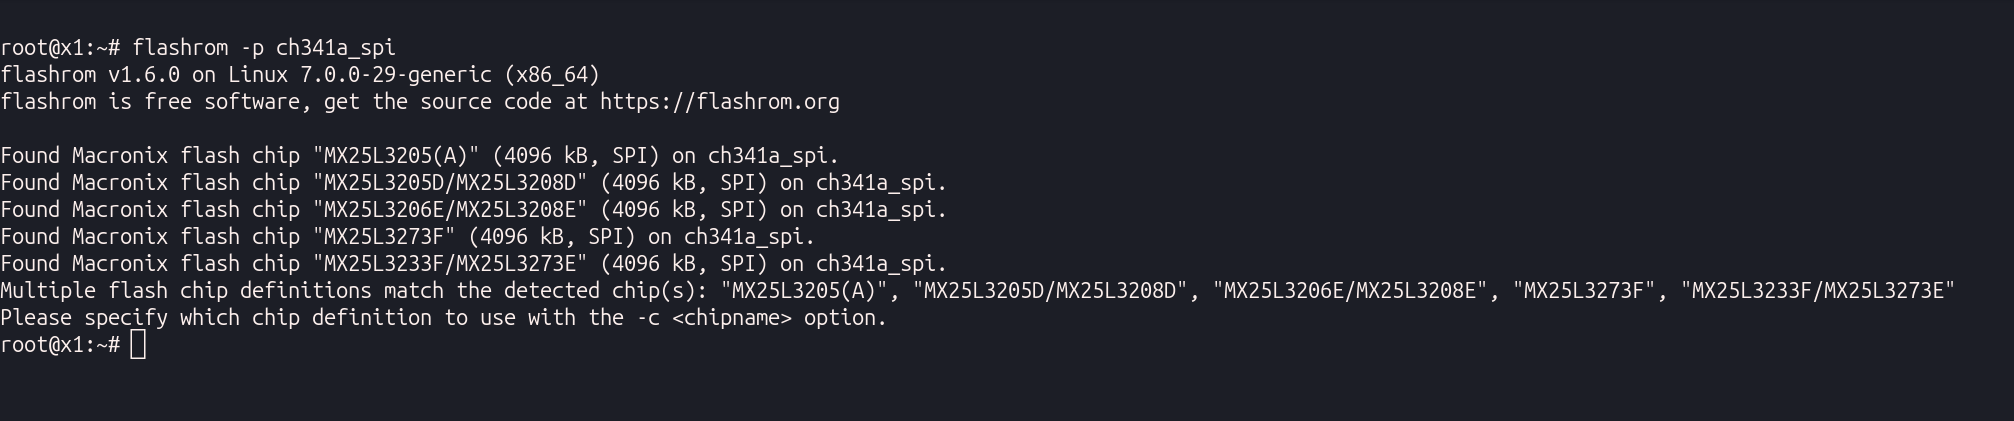
Listing chips found
Check if we identified the correct chip
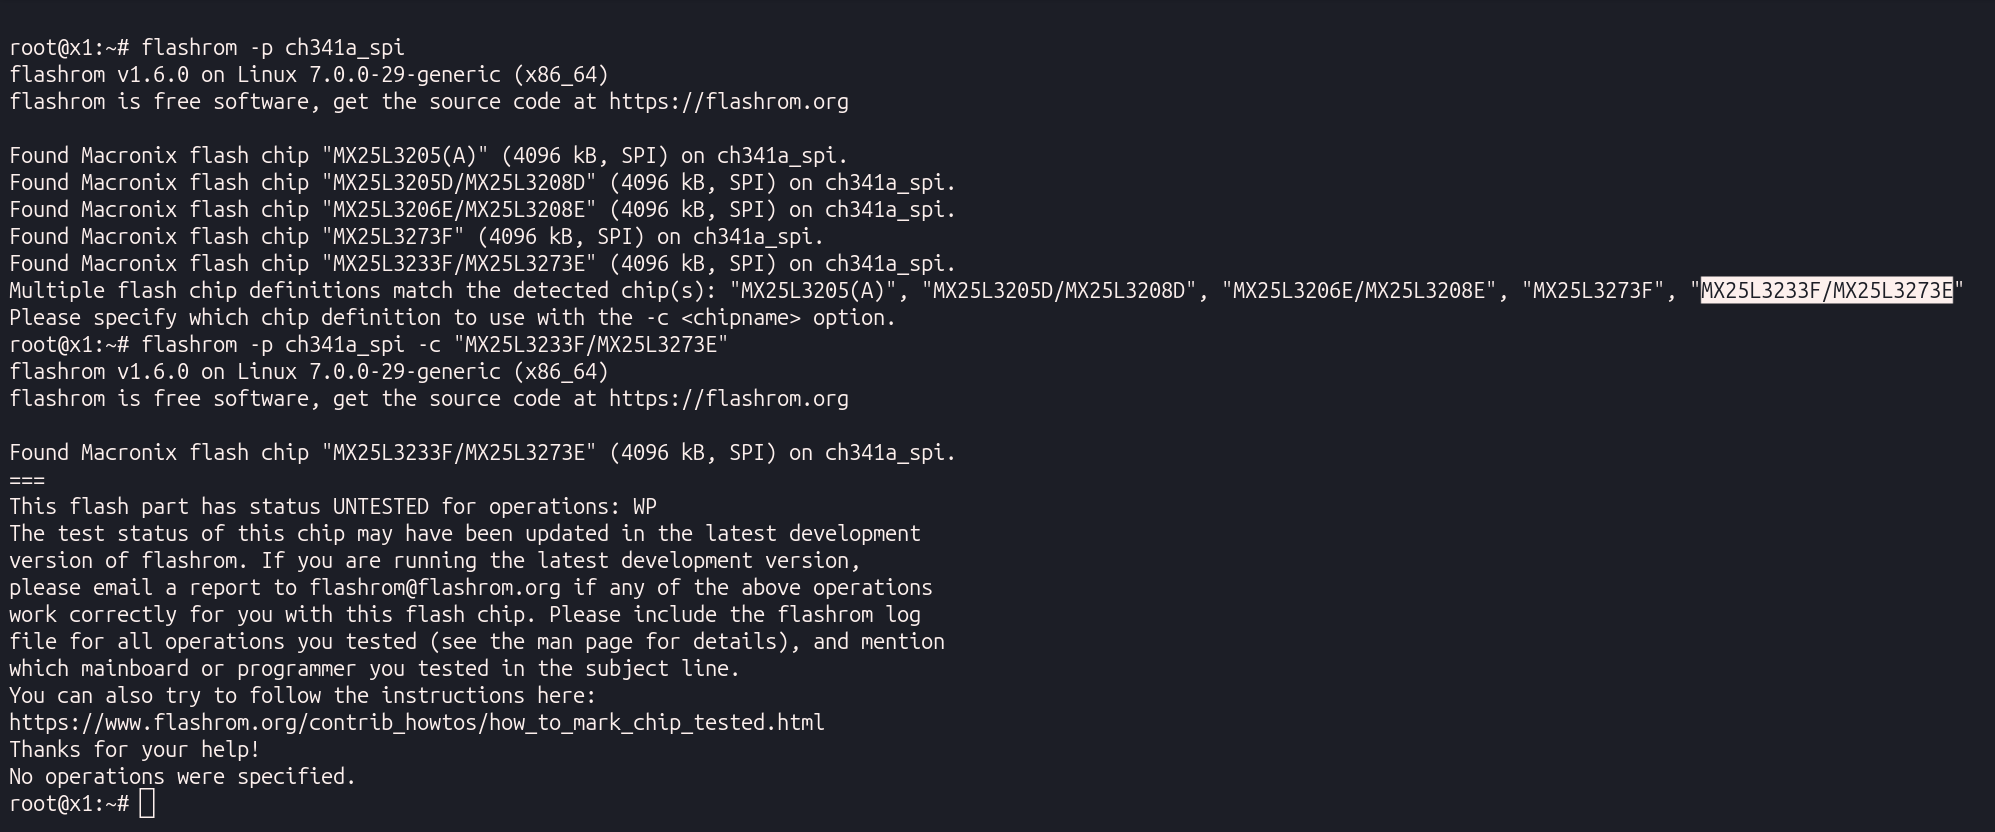
sudo flashrom -c "MX25L3233F/MX25L3273E" -p ch341a_spi -r t540p_original.bin
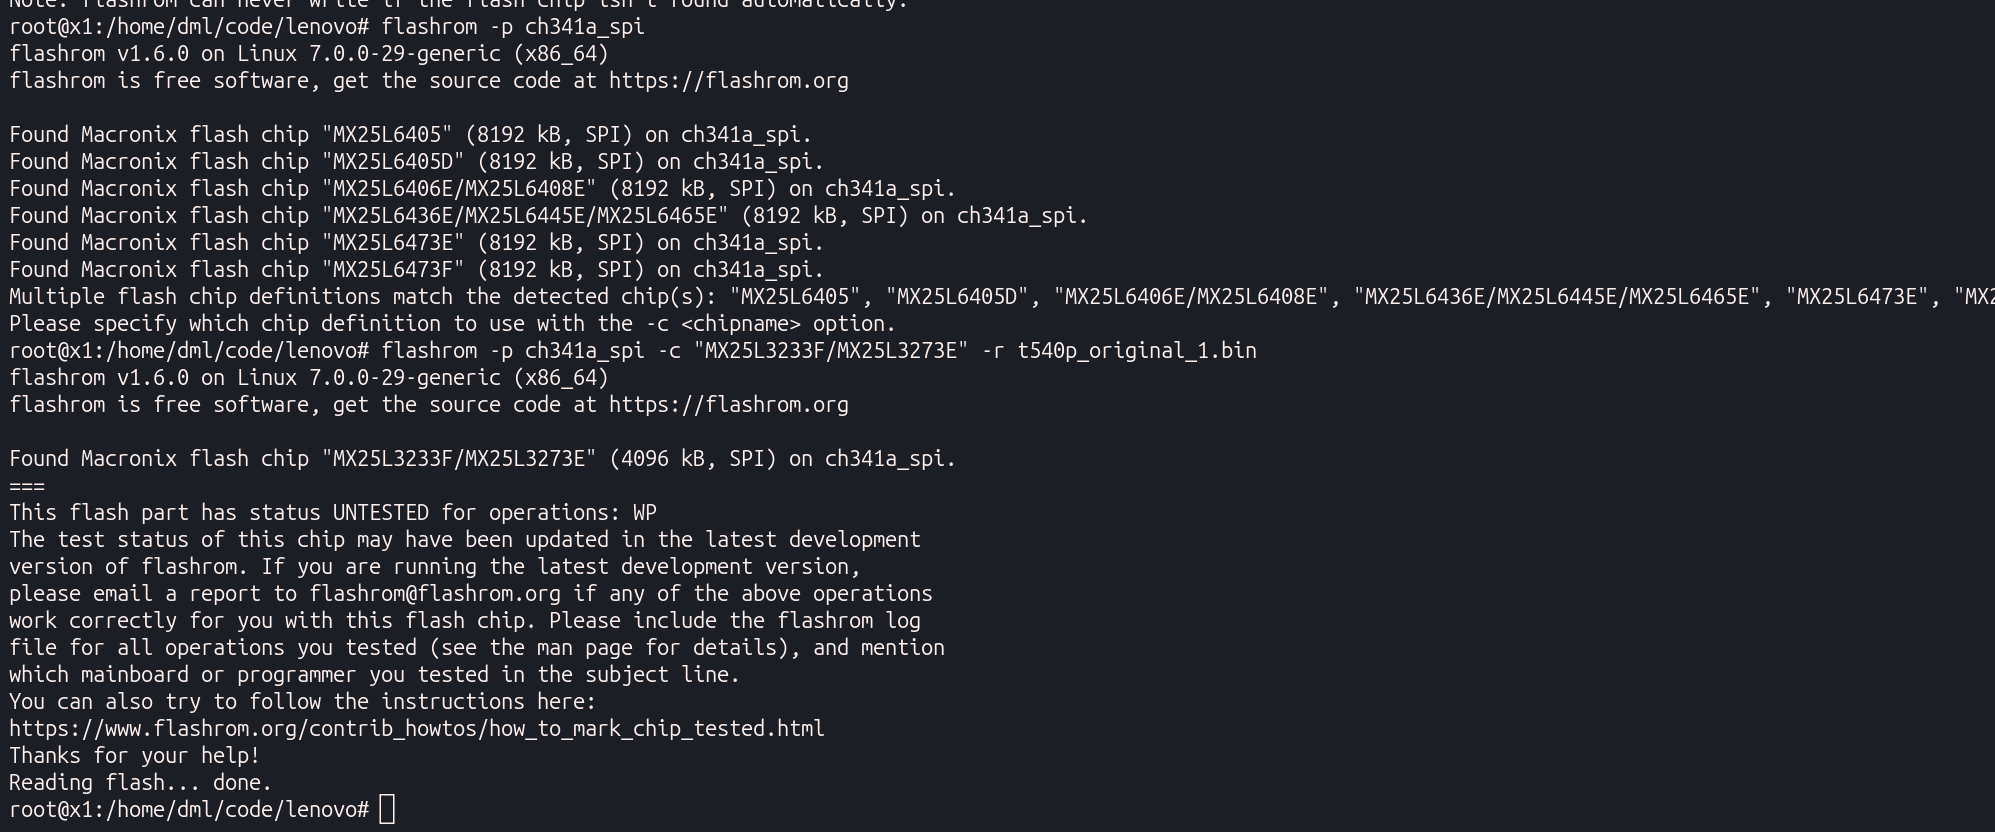
The chip is small enough that the clip is finicky. Read it three times and confirm the hashes match before touching anything:
sudo flashrom -c "MX25L3233F/MX25L3273E" -p ch341a_spi -r t540p_original_b2.bin
sudo flashrom -c "MX25L3233F/MX25L3273E" -p ch341a_spi -r t540p_original_b3.bin
sha256sum t540p_original*.bin
That verified dump is the single recovery path if anything goes wrong later — keep it somewhere safe.
Patching the BIOS
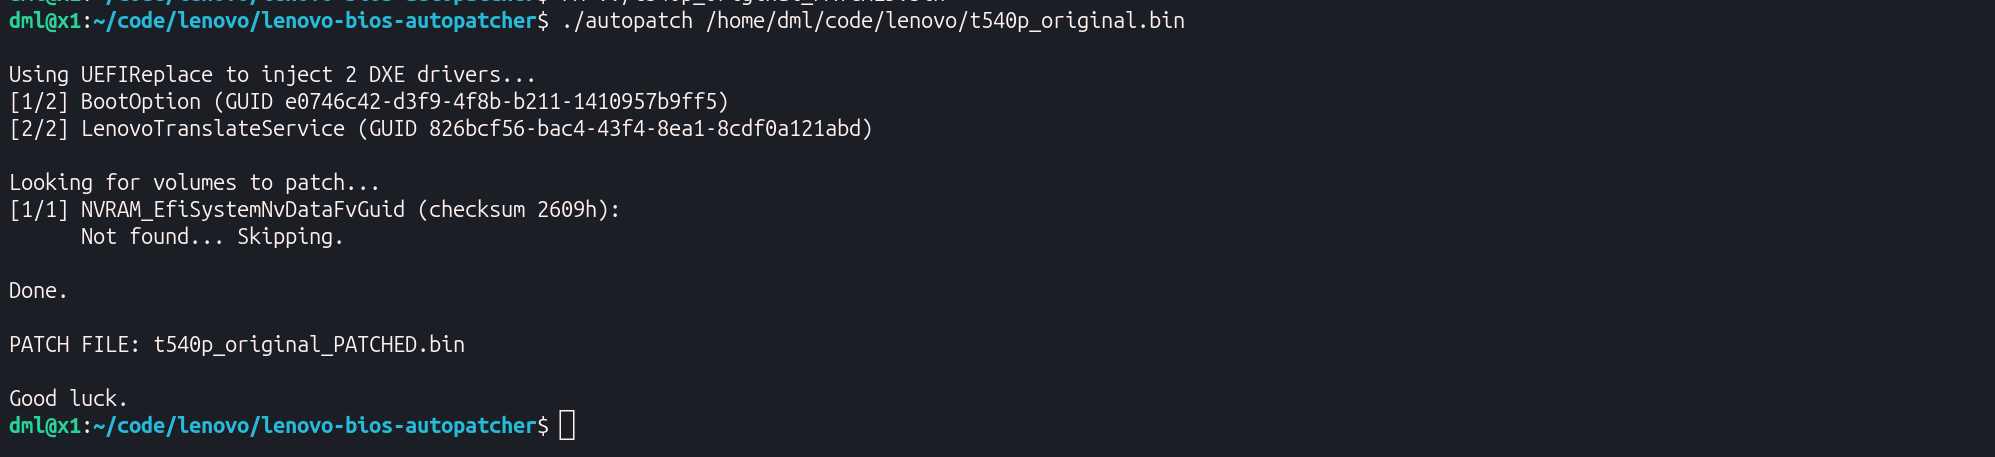
The Lenovo auto-patcher from the Badcaps forum community (lenovo-bios-autopatcher) does the heavy lifting: it replaces two DXE drivers in the firmware image (BootOption.ffs and LenovoTranslateService.ffs). On boot, the modified translation service presents a password challenge instead of a hard lock, which lets you generate a one-time unlock code.
cd lenovo-bios-autopatcher
./autopatch /path/to/t540p_original.bin
This produces t540p_original_PATCHED.bin. On its own, though, this image would not boot on my machine — it black-screened every time.
The black-screen trap: Insyde H2O RSA signature
ThinkPads of this era use an Insyde H2O firmware. Starting around certain BIOS builds, the firmware carries an RSA-signed block called TCPABIOS that stores a SHA1 checksum for the main firmware volume. When the auto-patcher injects the two DXE drivers, the volume bytes change, the SHA1 no longer matches what TCPABIOS records, and the BIOS treats the image as tampered.
On older BIOS builds the machine just beeps five times and continues. On the newer GMET91WW build it hard-stops with a black screen.
This is where the AI just simplifies so much our life, if I had to do this manually it would have taken ages, lots of trial and error. So lets use AI for what it is really usefull I started this with a local model (Qwen3.6-35B-A3B) running on my Mac M1, it worked really well, but has there was a lot of trial and error even on AI side, I switched to deepseek-flash-v4 and it went fast and smooth.
The fix is to re-sign the modified image with a new RSA key and swap the corresponding public key into the image. The signature scheme is:
TCPABIOSblock stores the volume checksum and is itself RSA-signed (e = 3, 1024-bit)- The signing input is
0x00 * 108 + SHA1(block_data) - The 128-byte signature follows a
FF FF 83separator - The public key lives at a fixed offset in the same NVRAM region
It wrote a small tool (resign_bios.py) that does all of this automatically:
python3 resign_bios.py t540p_original_PATCHED.bin
This generates a fresh RSA keypair, updates the volume checksum in TCPABIOS, re-signs both TCPABIOS and TCPABBLK, and replaces the public key in the image. The output is t540p_original_PATCHED_SIGNED.bin, which boots cleanly.
Flashing and triggering the unlock
Flash the signed image:
sudo flashrom -c "MX25L3233F/MX25L3273E" -p ch341a_spi -w t540p_original_PATCHED_SIGNED.bin
Disconnect the programmer completely, then boot.
- At the Lenovo splash, press F1 to enter BIOS setup
- At the supervisor password prompt, type any character and press Enter
- Reboot, enter BIOS again, type the same character
- The screen shows a Hardware ID
- Press Enter, then press Spacebar twice
On many guides, this is where an unlock code appears. On GMET91WW the machine instead reported “TPM written” — meaning the password was cleared directly without issuing a code. Either way, write down whatever the BIOS displays.
Restoring the original BIOS
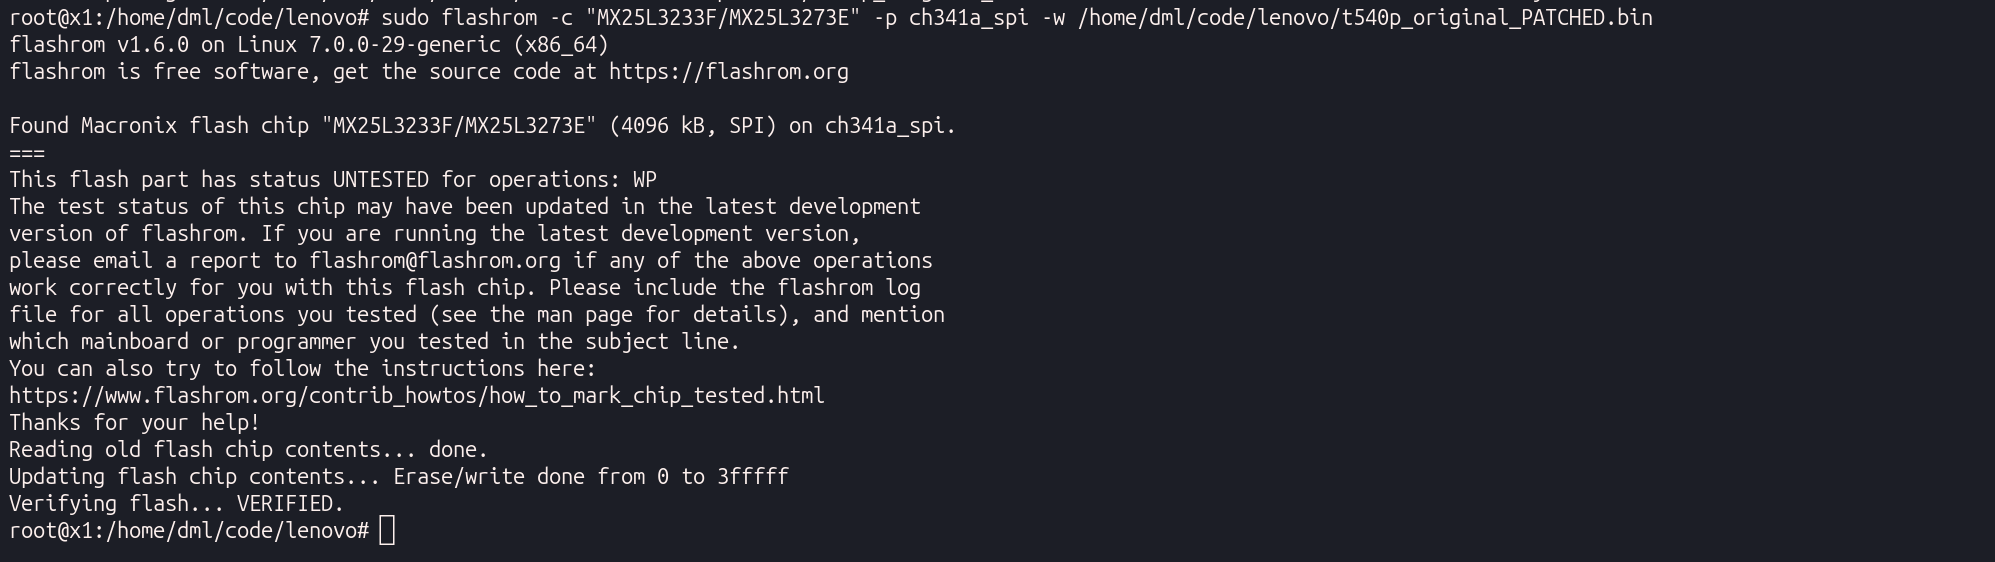
Once the unlock routine is done, flash the verified original dump back:
sudo flashrom -c "MX25L3233F/MX25L3273E" -p ch341a_spi -w t540p_original.bin
sudo flashrom -c "MX25L3233F/MX25L3273E" -p ch341a_spi --verify t540p_original.bin
Then power on. If an unlock code was issued, enter BIOS and press F9 to restore factory defaults, entering the code when prompted. On my unit the password was simply gone after the “TPM written” pass.
Gotchas
- The clip is the weak link. Erase failures at a fixed sector almost always mean marginal contact on one of the address lines — reads still work, but writes fail. Reseat the clip firmly and clean the pads.
- Chip auto-detection lies. Running
flashromwithout-csometimes reported an 8 MiB MX25L6405-family chip (a neighbouring part or marginal contact). Always pass-c "MX25L3233F/MX25L3273E"explicitly. - The NVRAM volume patch is not needed here. The auto-patcher ships a 1 MiB NVRAM volume file; this BIOS uses a 408 KiB NVRAM, so that step correctly reports “not found”. Leave the NVRAM alone — the DXE injection plus re-sign is what does the work.
- Backup first. The original dump is the only way back. I kept three verified copies before patching.
Summary
Removing a forgotten supervisor password from a ThinkPad T540p is very doable with a CH341A programmer and a SOIC-8 clip.
The straightforward recipe is: dump → verify → auto-patch → flash → unlock → restore. On newer BIOS builds you additionally have to re-sign the patched image, because the Insyde H2O firmware verifies an RSA signature over the firmware volumes. Once I added that step, the machine booted, presented the unlock challenge, and the password was gone in one pass.
The whole procedure, including the re-signing tool and step-by-step workflow, is available in my lenovo-bios-unlock repository.
Disclaimer: This work was done purely for research and to recover from a problem caused by an official Lenovo BIOS update, on my own hardware. It is not intended to facilitate bypassing security on equipment you do not own, and it should not be used for any illegal purpose.
Disclaimer: I use AI as a productivity tool. For a senior engineer, AI is incredibly powerful as one can focus on the solution design and conceptualization and leave the boring part that is implementation to the AI.